The purpose of this article is to introduce a portal solution for Microsoft Dynamics CRM; The concept can be used on other
business software + portal, such as ERP, SCM etc.
From the solution perspective, there are two types of portal:
- Stand-alone Portal - this is a dedicated portal website for CRM, it handles all CRM users security access, CRM interactivity, portal users authentication and authorisation etc.
Example for this stand-alone portal solution: the CRM SDK has a portal sample from AdxStudio, which fits in this solution. You can even manage the portal website within CRM - it treats CRM as a CMS system.
- Integrated Portal - this is an existing website with CRM portal integration, the website manages its own security access and users, CRM portal is an add-on functionality that handles the CRM interactivity.
Example for this integrated portal solution: Imagine you have an existing company website that needs accept customers order, feedback etc. and send these requests into CRM directly. You might also want the customers can interactive with some CRM data.
The solution I'm going to introduce is the latter. It uses Orchard as the host website, then add CRM portal as an add-on function (call "Module" in Orchard, which effectively is an "Area" in ASP.Net MVC. ) on the website. This is not the how-to article about Orchard, but here's some background information of why I choose Orchard as the host for the CRM portal solution. The whole solution can sit on any .Net hosting provider, such as Windows Azure.
So let's call it "
Orchard CRM" from now on - start with Orchard:
Orchard
In short, Orchard is a free, open source CMS system that built on the
cutting-edge version of ASP.Net MVC platform (that's what I really like about Orchard). It can be extended using "Modules" ( majorly on the functional side) and "Themes" (majorly on the look&feel side).
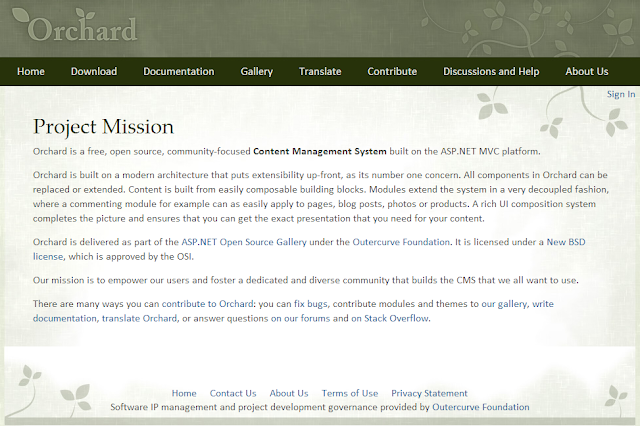 |
| Orchard Project Mission |
Install Orchard
You can install Orchard locally using the following ways:
- Install it using the Microsoft Web Platform Installer.
- Install it from Microsoft WebMatrix as shown in Working with Orchard in WebMatrix.
- Download the Orchard .zip file and install it as described in Manually Installing Orchard Using a zip File.
- Enlist in the Orchard source code and build Orchard from the command line or in Visual Studio.
Note: You can also quickly build a Orchard site in Windows Azure website gallery directly.
Build a default Orchard site from the source code
If you want to write your own module or modify an existing module like Orchard CRM, you need the Orchard source code.
- Download Orchard source file and extract to a local folder, i.e. D:\Orchard.Source.1.6.1\
- Use Visual Studio to open the solution file: D:\Orchard.Source.1.6.1\src\Orchard.sln
- Build the solution, then Run it - it will load the Orchard website "Get Started" page.
- Type in the site information then click the "Finish Setup" button. The default Orchard site is now created.
- You can mange the Orchard site by clicking the 'admin' link on the bottom.
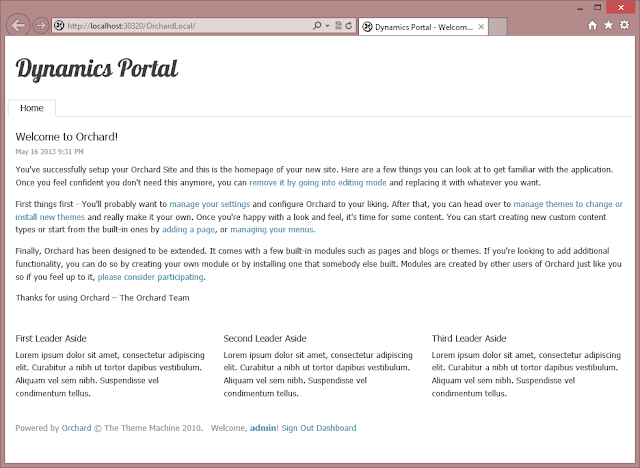 |
| Default Orchard Site |
Install and Configure the CRM module
You can install a module via the Admin Dashboard by clicking the "Dashboard" link on the homepage, or just type in the URL, i.e.: http://localhost:30320/OrchardLocal
/Admin ,
In the Admin Dashboard, click the Modules link on the left navigation bar, then click the "Gallery" tab, search for "Dynamics CRM".
Then click the "Install" link, after the module has been installed, click "OK" to enable the module.
Now, you should see the "Dynamics CRM" menu under "Setting". Click the link and then input the CRM connection string, for example:
- CRM Online: "Server=https://crmurl/yourorgname; Username=domain\crmservice; Password=servicepassword"
- CRM OnPrem: "Server=https://crmurl/yourorgname; Username=domain\crmservice; Password=servicepassword"
Finally click the "Save" button on the bottom.
I suggest you create a brand new CRM instance (or use the CRM Online trial) to run it first.
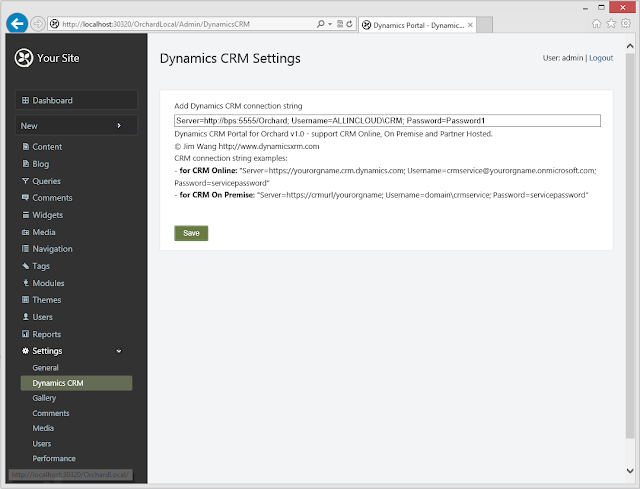 |
| Orchard CRM Setting |
Now the CRM module has been enabled and configured, try to browse the following link to see if it works: http://localhost:30320/OrchardLocal
/DynamicsCRM
Because this is the first time you run Orchard CRM and there isn't any data in the CRM system, so the page will relocate to the /
DynamicsCRM/Account view, so you can input your information, and save it. Once saved, a Contact record will be auto-generated with all information you input on the page, as well as the user identifier value (Orchard User ID).
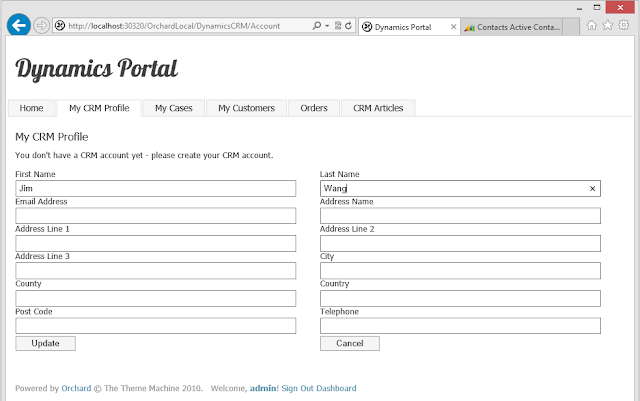 |
| Orchard CRM - Profile Page |
So next time, when you login to Orchard CRM, your profile will be identified.
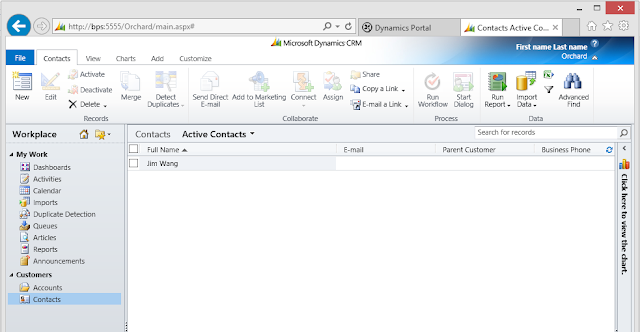 |
| Dynamics CRM - Contact |
Add Navigation Item
The following CRM functions are available in this module (v1.0)
- My CRM Profile - My profile in CRM, url: /DynamicsCRM/Account
- My Cases - My cases in CRM, url: /DynamicsCRM/Case
- My Customers - My sub-contacts in CRM, url: /DynamicsCRM/Customer
- Orders - Orders from me and my sub-contacts, url: /DynamicsCRM/Order
- Articles - All published CRM articles, url: /DynamicsCRM/Article
You can add navigation menu for them on the homepage. On the Admin portal, click the Navigation menu, then add "Custom Link":
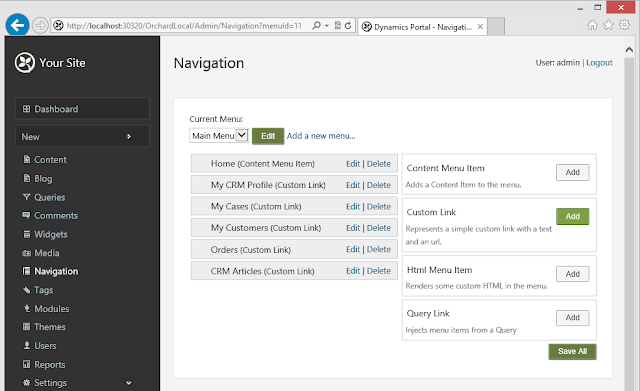 |
| Orchard Navigation |
Type in Menu text and Url, then click "Save". (repeat this step to add all links)
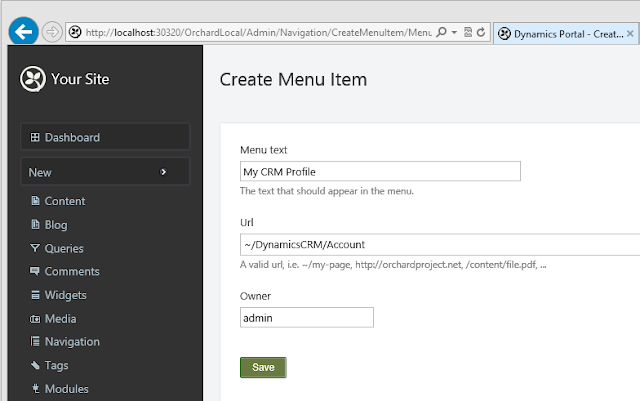 |
| Orchard Menu Item |
On the Navigation page, click "Save All".
The module can be downloaded here (open source NuGet package):
https://gallery.orchardproject.net/List/Modules/Orchard.Module.DynamicsCRM
Note: this is an open source package I built for the the community and demo purpose; you can extend the functionality and enhance the security further to support your business case.
In the next post I will discuss the application design of the Orchard CRM.


